|
|
8 lat temu | |
|---|---|---|
| modules | 9 lat temu | |
| shaderexamples | 8 lat temu | |
| src | 8 lat temu | |
| .gitignore | 9 lat temu | |
| CMakeLists.txt | 8 lat temu | |
| COPYING | 11 lat temu | |
| README.md | 8 lat temu | |
| license.txt | 11 lat temu | |
| slop.1 | 8 lat temu | |
| slop.1.gz | 8 lat temu |
README.md
slop
slop (Select Operation) is an application that queries for a selection from the user and prints the region to stdout.
Features
- Hovering over a window will cause a selection rectangle to appear over it.
- Clicking on a window makes slop return the dimensions of the window, and it's ID.
- OpenGL accelerated graphics where possible.
- Supports simple arguments:
- Change selection rectangle border size.
- Select X display.
- Set padding size.
- Force window, or pixel selections with the tolerance flag.
- Set the color of the selection rectangles to match your theme! (Even supports transparency!)
- Remove window decorations from selections.
- Supports custom programmable shaders.
Practical Applications
slop can be used to create a video recording script in only two lines of code.
#!/bin/bash
read -r X Y W H G ID < <(slop -f "%x %y %w %h %g %i")
ffmpeg -f x11grab -s "$W"x"$H" -i :0.0+$X,$Y -f alsa -i pulse ~/myfile.webm
You can also take images using imagemagick like so:
#!/bin/bash
read -r G < <(slop -f "%g")
import -window root -crop $G ~/myimage.png
If you don't like ImageMagick's import: Check out maim for a better screenshot utility.
Lets see some action
Ok. Here's a comparison between 'scrot -s's selection and slop's:
You can see scrot leaves garbage lines over the things you're trying to screenshot! While slop not only looks nicer, it's impossible for it to end up in screenshots or recordings because it waits for DestroyNotify events before completely shutting down. Only after the window is completely destroyed can anything take a screenshot.
how to install
Install using your Package Manager (Preferred)
- Arch Linux: community/slop
- Void Linux: slop
- FreeBSD: x11/slop
- OpenBSD: graphics/slop
- CRUX: 6c37/slop
- Gentoo: x11-misc/slop
- GNU Guix: slop
- Debian: slop
- Please make a package for slop on your favorite system, and make a pull request to add it to this list.
Install using CMake (Requires CMake)
Note: Dependencies should be installed first: libxext, OpenGL, and glm.
git clone https://github.com/naelstrof/slop.git
cd slop
cmake -DCMAKE_INSTALL_PREFIX="/usr" ./
make && sudo make install
Shaders
Slop allows for chained post-processing shaders. Shaders are written in a language called GLSL, and have access to the following data from slop:
| GLSL Name | Data Type | Bound to |
|---|---|---|
| mouse | vec2 | The mouse position on the screen. |
| desktop | sampler2D | An upside-down snapshot of the desktop, this doesn't update as the screen changes. |
| texture | sampler2D | The current pixel values of slop's frame buffer. Usually just contains the selection rectangle. |
| screenSize | vec2 | The dimensions of the screen, where the x value is the width. |
| position | vec2 attribute | This contains the vertex data for the rectangle. Only contains (0,0), (1,0), (1,1), and (0,1). |
| uv | vec2 attribute | Same as the position, this contians the UV information of each vertex. |
The desktop texture is upside-down because flipping it would cost valuable time.
Shaders must be placed in your ${XDG_CONFIG_HOME}/slop directory, where XDG_CONFIG_HOME is typically ~/.config/. This folder won't exist unless you make it yourself.
Shaders are loaded from the --shader flag in slop. They are delimited by commas, and rendered in order from left to right. This way you can combine multiple shaders for interesting effects! For example, slop -rblur1,wiggle would load ~/.config/slop/blur1{.frag,.vert} and ~/.config/slop/wiggle{.frag,.vert}. Then render the selection rectangle twice, each time accumulating the changes from the different shaders.
Enough chatting about it though, here's some example shaders you can copy from shaderexamples to ~/.config/slop to try out!
The files listed to the right of the | are the required files for the command to the left to work correctly.
slop -r blur1,blur2 -b 100|~/.config/slop/{blur1,blur2}{.frag,.vert}
slop -r wiggle -b 10|~/.config/slop/wiggle{.frag,.vert}
And all together now...
slop -r blur1,blur2,wiggle -b 50 -c 1,1,1|~/.config/slop/{blur1,blur2,wiggle}{.frag,.vert}
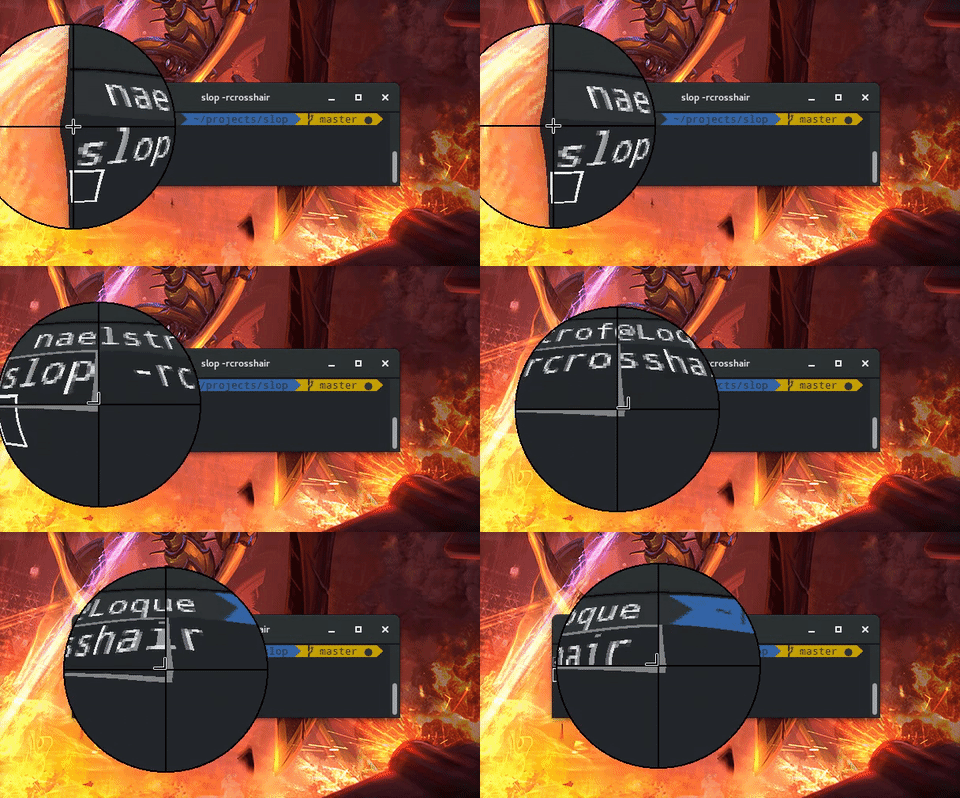
Finally here's an example of a magnifying glass.
slop -r crosshair|~/.config/slop/crosshair{.frag,.vert}
It's fairly easy to adjust how the shaders work by editing them with your favourite text editor. Or even make your own!


